Adsorba Bruyere Extra Pipe Refurb

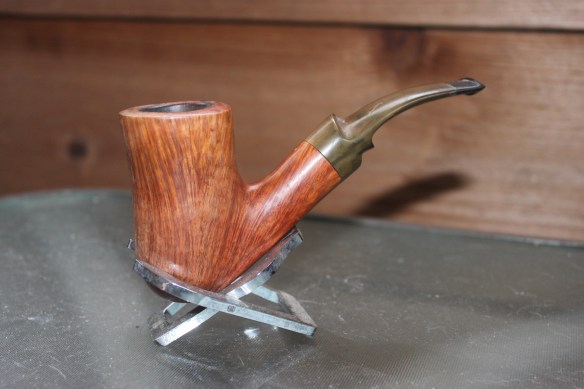
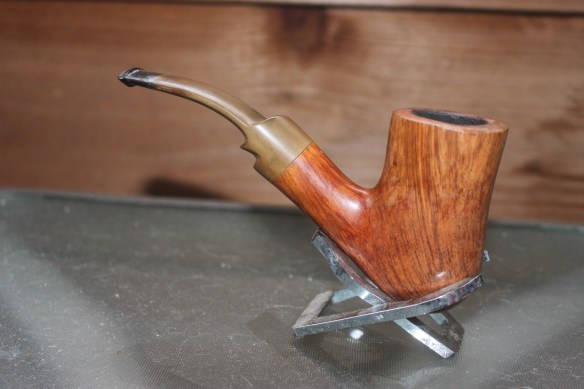
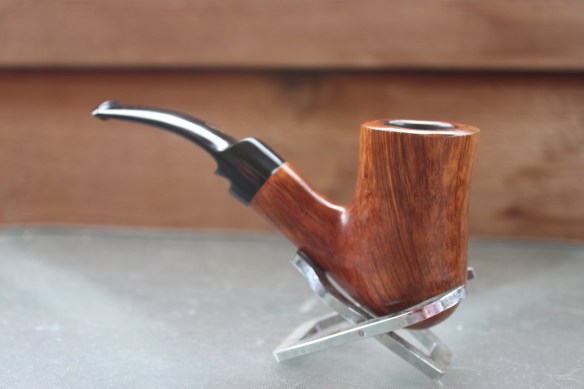
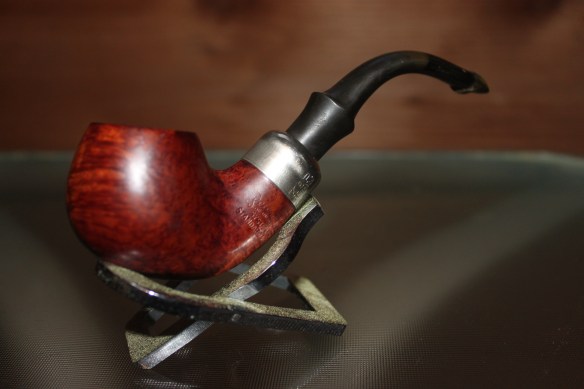
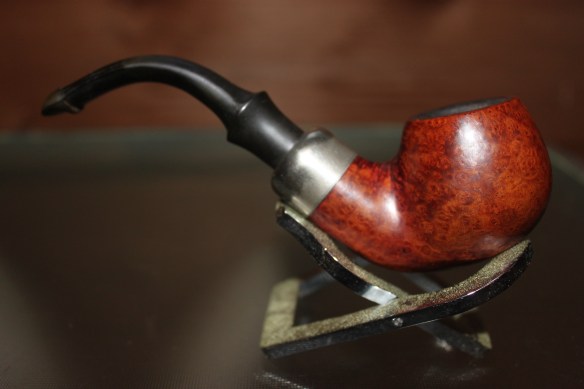
Hey folks! This beauty is hitting eBay right now. Check out the before and after pics!
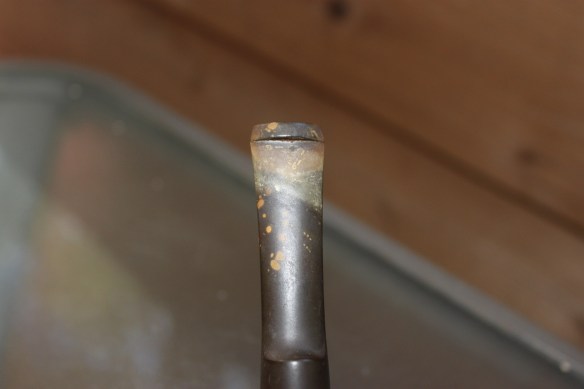
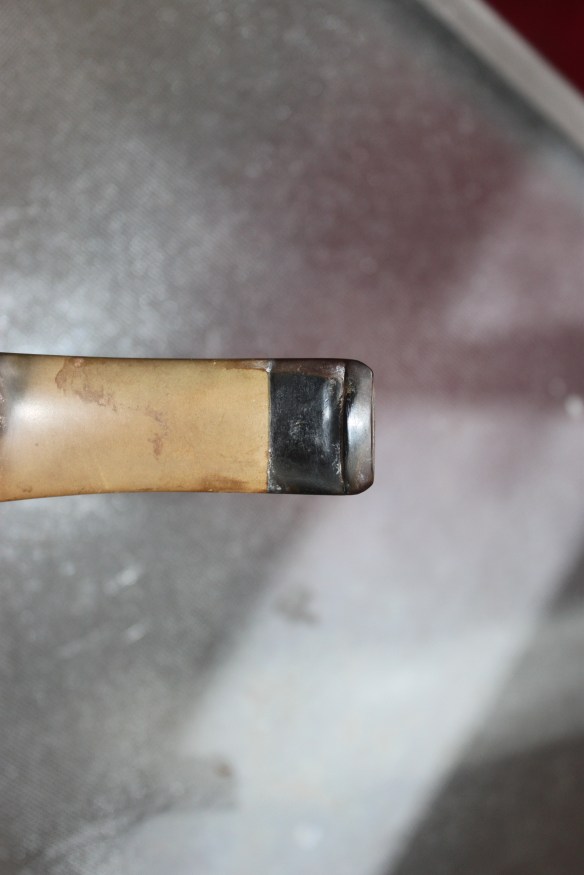
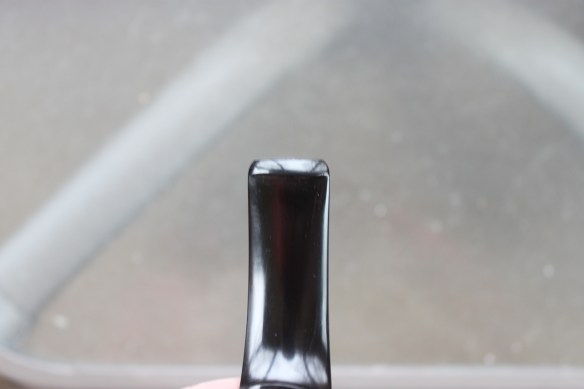
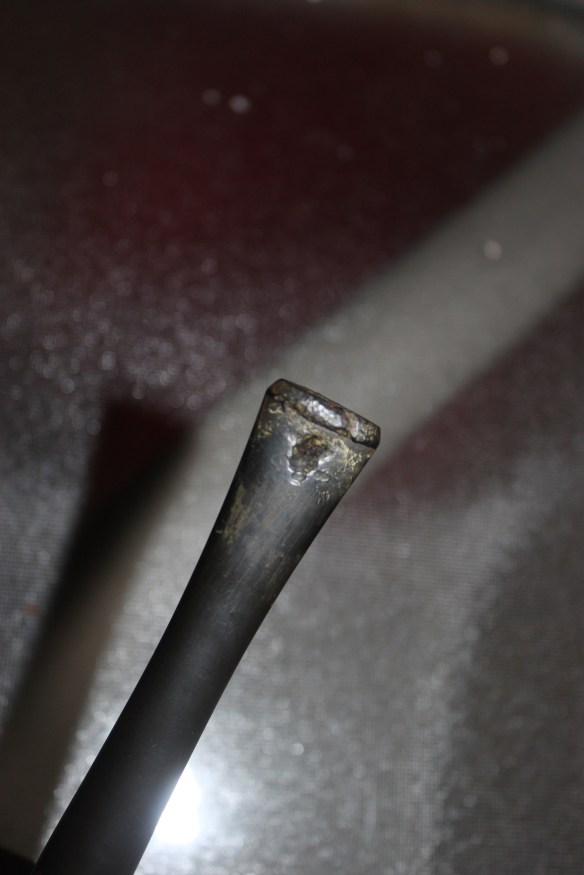
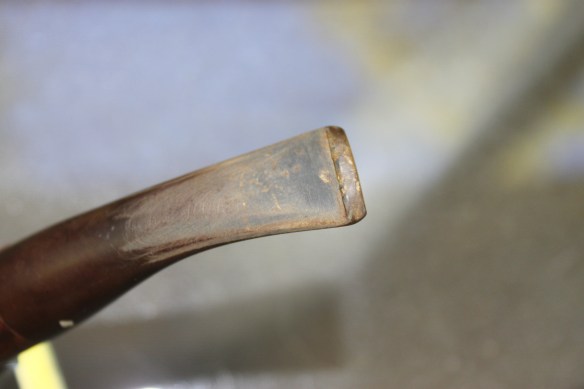
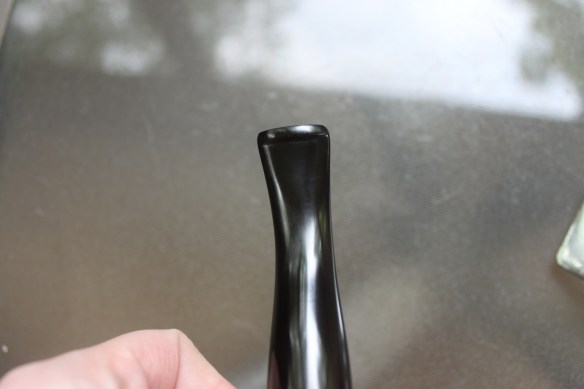
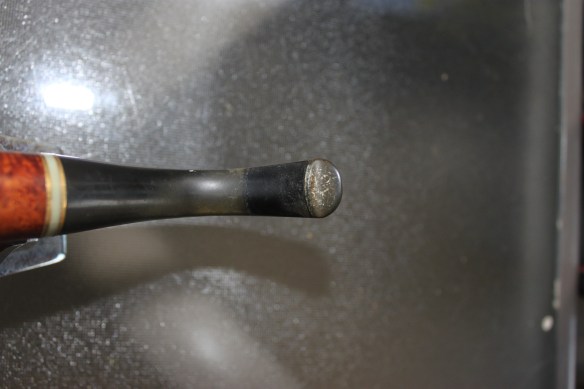
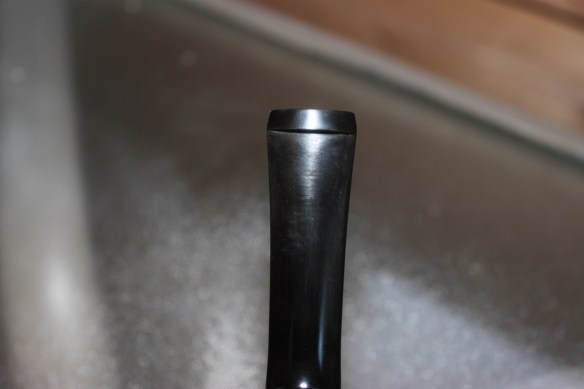
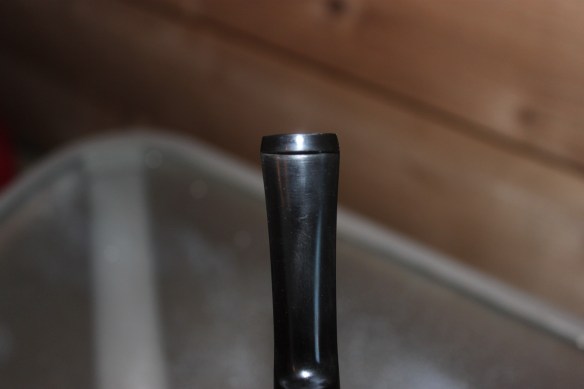
IMG_3632IMG_3633IMG_3634IMG_3635IMG_3636

Stem
Oh man! Can you say “GROSS”?!That stem is nasty. I started with a bleach bath, gave it a quick rinse and then hit it with some steel wool. Right after that, I gave it a wet sanding with 500 grit, 1000 grit, and 1200 grit. I then scrubbed the mess out of the inside of the stem with pipe cleaners, q-tips, and a high-proof cheap vodka. The outside of the stem was then buffed with red tripoli and then carnauba wax.
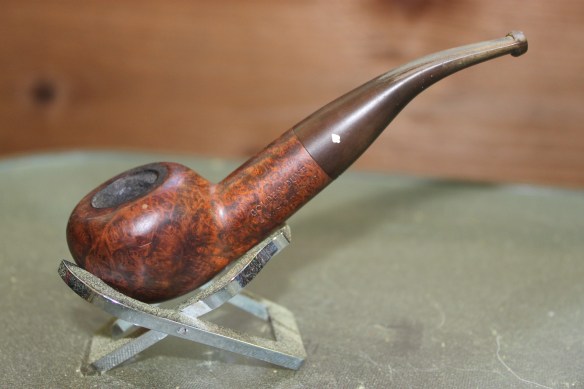
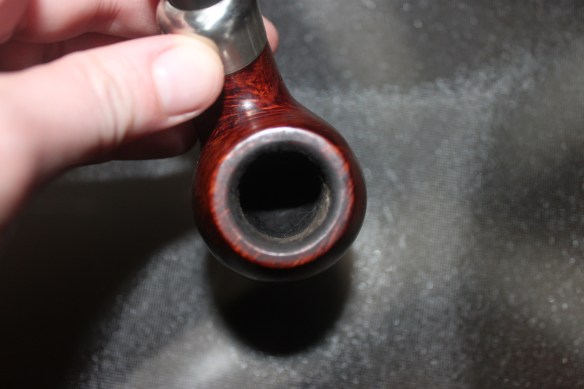
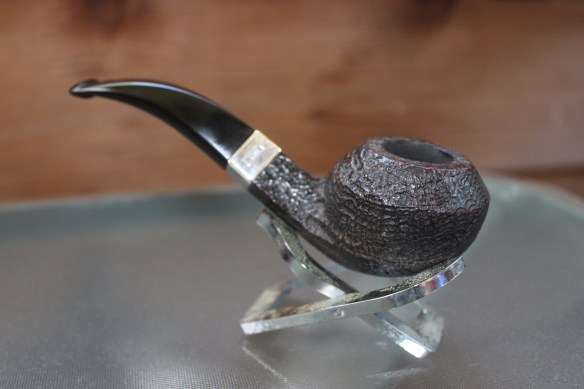
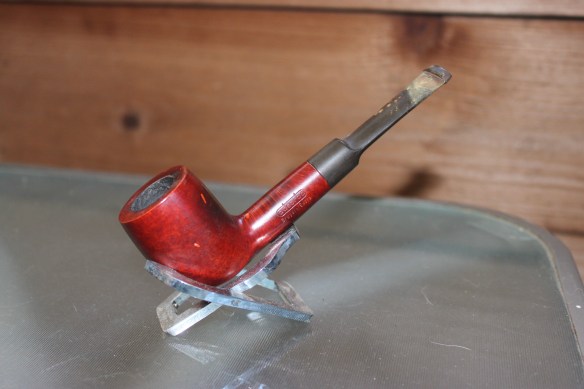
Bowl
Well, the bowl was pretty well worn, lots of char in the bowl, and lots of char on the rim. I had to sand off the entire stain. I wet sanded the outside with 500 grit, 1000 grit, and 1200 grit. I also sanded the top of the bowl the same way. I then took a pipe reamer to the inside only to find tiny little cracks in the char. To get out all of the char dust and to sanitize, I cleaned the inside of the bowl with q-tips and high-proof vodka. The scrubbing included the shank to sanitize. Once all of the crud was removed, I then put a heavy bowl coating on the inside to make it uniform once more and smooth for a good smoke. I re-stained the outside with a red stain, then sanded with micro-mesh 1500+. AFter than sanding, I re-dyed it again but with brown. The double dyeing gives the bowl grain more depth.

IMG_3637IMG_3638IMG_3639IMG_3640IMG_3641

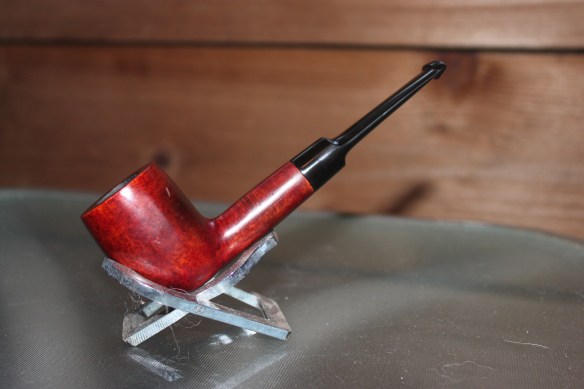
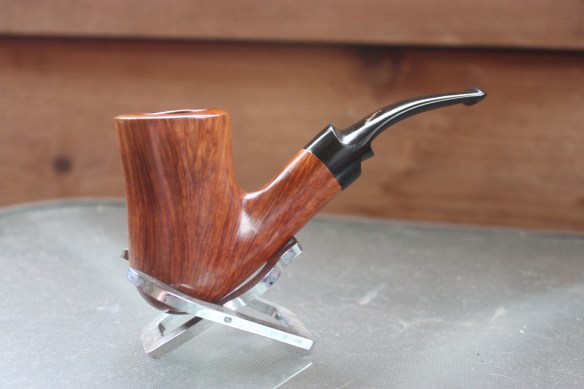
Ahhhhh, that looks and feels much better! If you would like to see the pipe (if it’s still listed), you can check the link here: Adsorba Bruyere Extra Pipe

Thanks for reading!

Savinelli Autograph 8 Refurb

I had the pleasure of cleaning up this pipe for a good friend of mine. He said it had been gifted to him and he wanted it in top notch shape before he added it to his rotation. So check out the before and after pictures!

IMG_3332

IMG_3333

IMG_3334

IMG_3335

IMG_3336

Stem
I did my usually clean up to get the oxidation off. I wet-sanded with 500 grit, 1000 grit, and 1200 grit. I had to really be careful around the golden autograph on the stem, it can be hard to get around those tiny lines but it’s worth the patience! I scrubbed the inside clean with high proof vodka and pipe cleaners. The stem was finished with a buffing of red tripoli and a buffing of carnauba wax.

Bowl
Luckily the bowl didn’t have too much cake in it but I went ahead and reamed what was built up. The cake was pretty soft on this one. The inside then was cleaned with high proof vodka and q-tips to get all the carbon dust out. I decided that I wanted to do a bowl coating to protect the inside, so I applied that and let it dry. There was some slight scorching right on inside edge of the rim so I lightly sanded it off with 1200 grit. I cleaned the shank with high proof vodka and q-tips/pipe cleaners. The bowl was also finished with a buffing of red tripoli and a buffing of carnauba wax. Here is the finished product!

IMG_3339

IMG_3340

IMG_3341

IMG_3342

IMG_3343

I hope you enjoyed!

Elva Iris Style Pipe Refurb

New pipe for a new challenge! This pipe was certainly a one-of-a-kind to work on. I have never seen one carved like this. It is literally carved to look like an Iris flower. Plus, I had never heard of the Elva brand before, so that was new too. Check out the refurb process below!

IMG_3322

IMG_3323

IMG_3324

IMG_3325

IMG_3326

Stem
I knew that this stem would have to be patched, but to get down to a good surface, I have to clean off a couple of the oxidized surfaces. So I started by wet sanding the stem with 500 grit, 1000 grit, and then 1200 grit. The way the previous owner had smoked it had created an indent into the airway rather than a hole. I had to break out some of the indented material from the inside, which created a small hole that I would patch. I patched the stem using cyanoacrylate and activated charcoal. After a few layers, it was built up enough, then I proceed with the wet sanding of 500 grit, 1000 grit, and 1200 grit. I then sanitized the inside of the stem with high proof vodka and pipe cleaners. The stem was finished with a buffing of re tripoli and a buffing of carnauba wax.

Bowl
This bowl was tricky! I started by reaming the inside of the bowl to remove charcoal buildup. The bowl was then sanitized and cleaned with q-tips and high proof vodka. The top of the bowl was charred pretty good, so I worked on topping the bowl with some light sandpaper. That was really tricky since the petals of the Iris stick up above the top of the bowl. One of the petals had been broken by the previous owner and glued back into place, the glue stuck out in a couple places. I decided to sand down the glue to make it a smoother patch. I then put a bowl coating on the inside of the bowl to protect it. I lightly re-stained the top of the bowl after the topping. The shank was also sanitized with q-tips and high proof vodka. The bowl was finished with a buffing of red tripoli and a buffing of carnauba wax (as best I could, it was really tough around those petals)! Here is the finished product!

IMG_3327

IMG_3328

IMG_3329

IMG_3330

IMG_3331

I hope you enjoyed the refurb! Let me know about the weird pipes you own or have worked on!

Padilla Miami Cigar Review

IMG_2892

I remember a few years ago hearing some about the Padilla Miami from a rep. I don’t recall ever smoking one though! One of my friends, David, was kind enough to gift me with 7 cigars from his personal collection. The Padilla Miami was one of them! From my research and understanding, they aren’t made anymore or it was possibly limited (one site says it was extremely limited). Either way, it was very generous and I am happy to take it back with a few years with this smoke. David said he thinks they have been in his humidor about 6-7 years. So remember it could have changed a bit over time! Here we go!

Blend Profile
Wrapper: 2002 Corojo Cuban-seed wrapper
Binder: ???
Filler: Nicaraguan
Vitola: Torpedo. 6×52

Appearance & Smell
This cigar has a rich brown wrapper with a tint of reddish to it. It’s a little bit toothy also. It has some vines but they are not overly noticeable when you are holding it. It looks and feels well-constructed. During the aging process it looks as if it was very well taken care of. The smell is deep, earthy, and spicy.

Smoke Preparation
I used my trusty Xi1 cutter to put a flat cut on the torpedo and a Xikar Enigma double torch to light it up

IMG_2893.JPG

Burn & Draw
You can see after the first picture, it looked to be burning a bit crooked but it corrected itself over the smoke. The draw was good but slightly tighter than many cigars today. It wasn’t overly tight though. I enjoyed it.

IMG_2894.JPG

Strength & Body
I thought this cigar would be a medium to a medium-plus…. Ooooowwweeee! It came in starting at a medium-plus and finished full. It had a great body to go with the strength! Cocoa notes stayed pretty consistent, red spice was evident, the earthiness also stayed from the original smell. It didn’t seem to get one-dimensional at all, it stayed fluid.

Final Thoughts
I am especially grateful to my friend for sharing some of his personal cigars. It was so very kind of him! Part of me is also sad that I won’t be able to get more! To hold that much strength and body with proper aging, this is one heck of a cigar! If you happen to have any left. I would suggest hanging on to them or only giving them out for special occasions. From my research they went for $8-$12 retail. Enjoy them if you have them!

IMG_2895.JPG

IMG_2896.JPG

Golden Duke Dr. Grabow Refurb

This part of a group of pipes that were sent to me from a friend to be refurbished. I love the way it turned out! Check out the before and after pics. I apologize for the lighting in the after pics but you get the idea!

IMG_2806.JPG

IMG_2808.JPG

IMG_2807.JPG

IMG_2809.JPG

IMG_2810.JPG

IMG_2811.JPG

Stem
To remove the oxidation from the stem I wet sanded it. I used 500 grit, 1000 grit, and 1200 grit. I then sanitized and cleaned it out with high proof vodka and pipe cleaners. To finish up the stem I gave it a buffing of red tripoli and a buffing of carnauba wax. I used the adjustomatic feature to straighten up the stem with the bowl.

Bowl
I reamed the bowl to get rid of build up. I then cleaned it out and sanitized it with q-tips and high proof vodka. The shank was then cleaned with q-tips and vodka too. I lightly topped the bowl to get rid of blackening. The bowl was finished with a buffing of red tripoli and a buffing of carnauba wax.

IMG_2846.JPG

IMG_2847.JPG

IMG_2848.JPG

IMG_2849.JPG

IMG_2851.JPG

I hope you enjoyed the process and pictures!

Peterson Standard System Pipe Refurb

This was another pipe that I had the opportunity to clean up for a friend. Check out the before and after pics!

IMG_2831

IMG_2832.JPG

IMG_2833.JPG

IMG_2834

IMG_2835.JPG

Stem
The stem had a bit of oxidation and chatter on it so I started with wet-sanding the stem. I used 500 grit, 1000 grit, and 1200 grit sandpaper. I then cleaned and sanitized the inside of the stem with pipe cleaners and high proof vodka. The finishing touches on the stem are two buffings, one with red tripoli and one with carnauba wax.

Bowl
The bowl got a good reaming and during the reaming I discovered some unevenness in the bottom of the bowl. I cleaned out the carbon dust, sanitized the bowl, and let it dry. To even up the bowl I used a professional grade bowl coating. I slightly topped the top of the bowl to remove blackening. I then cleaned and sanitized the shank which took quite a bit of scrubbing with high proof vodka due to a build up of tar. The bowl was finished with a buffing of red tripoli and a buffing of carnauba wax.

Here is the finished product!

IMG_2841.JPG

IMG_2842.JPG

IMG_2843.JPG

IMG_2844

IMG_2845.JPG

Thanks for looking!

Alec Bradley Fine & Rare 2017 Review

I have not had a great deal of experience with the Alec Bradley Fine & Rare series’. But a fellow cigar smoker gave me this beauty and I couldn’t help myself.


IMG_2822.JPG

Blend Profile
Wrapper: Honduras
Binder: Honduras
Filler: Honduras and Nicaragua
Vitola: Torpedo

Appearance & Smell
On the wrapper I smelled a lot of creamy sweetness. The foot gave me an earthy but also creamy smell. The appearance is very smooth, not a lot of veins, and a nice medium colored wrapper.

Smoke Preparation
I used my Xikar Xi1 to put a clean flat cut on the cap. Then I used a Xikar Enigma double torch to get a good even light.


IMG_2823.JPG

Burn & Draw
This was an easy and even light. The draw was slightly easier than most but not too light. As I started to really get into the cigar, it started burning uneven (as you can see above). I touched up the cigar multiple times throughout my smoke. The draw stayed consistent throughout the whole cigar.


IMG_2824.JPG

Strength & Body
Medium, medium, medium. It really stuck to the medium body of strength. I enjoyed the simplicity of the blend. The tobaccos didn’t change too much throughout the smoke. The initial smells were pretty spot on as to what the tastes would be: Creamy and earthy.

Final Thoughts
This was a cigar given to me by a friend and I know it’s not a cheap smoke. With that being said, I enjoyed it even though it had it’s problems. I don’t like having to touch-up a cigar multiple times while I’m smoking it. I did enjoy the flavors but I also wish that it had a little more depth to it.

Source: Friend
Brand Information: Alec Bradley

IMG_2825.JPG

IMG_2826.JPG


Peterson Emerald Pipe Refurb

I had the chance to get my hands on this Peterson Emerald and clean it up for a friend. Check out the transformation!

IMG_2777.JPG

IMG_2778.JPG

IMG_2779.JPG

IMG_2780

IMG_2781.JPG

Stem
The stem received my routine love. I wet-sanded off the oxidation using 500 grit, 1000 grit, and 1200 grit sandpaper. I then sanitized the inside of the stem and cleaned out any gunk that had made a home there. To finish the stem it received a buffing of red tripoli and a buffing of carnauba wax.

Bowl
The bowl received a reaming to clean off layers of unnecessary carbon build-up. After reaming it, I discovered that there were a couple of inconsistencies in the wood. I decided to sanitize the inside of the bowl and then put in a professional grade bowl coating to even it out. I then lightly removed the blackening from the top of the bowl. After that I sanitized and cleaned the inside of the shank very thoroughly to remove all of the tar build-up. The shank ring received a shining with some steel wool. To finish it up, the bowl also received a buffing with red tripoli and carnauba wax.

Here are the results!

IMG_2787.JPG

IMG_2788.JPG

IMG_2789

IMG_2790.JPG

img_2791.jpg

Thanks for looking!

Dunhill Pipe Refurb

I have had the opportunity to work on a couple different Dunhills and they are always a pleasure to work on. Before you think to yourself, “Well of course it is because of the prestige and the price tag! It’s really more about the reasons that Dunhill maintains the prestige and such a high price tag: Quality materials and craftsmanship. I can tell the difference in vulcanite stems that I work on and overtime I touch a Dunhill, I can feel the quality. Well, this refurb was for a friend and I hope you enjoy the before-and-after pics and he enjoys the smoke. Cheers!

IMG_2742.JPG

IMG_2743.JPG

IMG_2744.JPG

IMG_2745.JPG

IMG_2746.JPG

Stem
The stem just needed a good cleaning with oxidation removal. I wet-sanded the stem with the grits of 500, 1000, and 1200. The stem was then sanitized and cleaned in the airway. The finishing touches were a buffing of both red tripoli and carnauba wax.

Bowl
I reamed the bowl and was surprised to find the first mistake I had ever seen in a Dunhill! When drilling the shank into the bowl, they slightly over-drilled and went a little bit into the far side of the bowl. It wasn’t by any means a large drill mark but when being smoked, it created a bigger “hole” if you will. I don’t usually like to bowl coat Dunhills but I did on this one. After the reaming, sanitizing, and cleaning, I put in a professional grade bowl coating to help prevent that imperfection from getting worse or spreading. I then worked on getting some of the grime off the top of the bowl without hurting the rustication. I used a lot of q-tips and vodka. The shank was also cleaned and sanitized. The finishing touches were again buffing with both red tripoli and carnauba wax. Man! That really made the silver shank band shine!

Here is the finished product:

IMG_2760

IMG_2761.JPG

IMG_2762.JPG

IMG_2763.JPG

IMG_2764

Thanks for looking!

CAO Zocalo 6×60 Review (Pre-Release)

IMG_2728

So this review is going to be a little different than some of my others because I am missing quite a bit of the information. The reason I am missing the information is because this cigar has not been released yet. I was told that they haven’t even started shipping yet! Let’s get into it!

Blend Profile
I have exactly zero blend information on this one so I am flying blind.
Vitola: 6×60

Appearance & Smell
This cigar had a nice rich, brown wrapper that has a nice toothy feel to it. There was also a fair amount of oil on the outside of the wrapper. The band is interesting, big, and bold. I look forward to hearing more about how the label came about. The smell is earthy and has some cocoa. There was also a faint hint of spice.

Smoke Preparation
I seem to be in a habit lately… I once again used my Xikar Xi1 to put a flat cut on the cap and my Xikar Enigma double torch to get it lit.

IMG_2729.JPG

Burn & Draw
This cigar kept a very nice even burn throughout the whole smoke. I know it had to be a sample but it didn’t seem to need any extra rest to burn correctly. The draw was great for a 6×60.

IMG_2730.JPG

Strength & Body
This cigar was in the medium to medium-plus in terms of strength for me. The body was there and it had a nice complexity of flavors that did change a little bit throughout the smoke. After the initial lighting I was picking up more of the spice that I had smelled. As the cigar went on, I got more of the cocoa and earthiness.

Final Thoughts
The truth is: I’m not a big CAO fan. I never really have been. I enjoyed the America and the Brazilia and that was about it. This cigar seemed to sway me to think a little more positively of CAO. I was impressed by the flavors and the great construction of the cigar. I have no information about the price point but I am really curious to find out how much these will retail for and which other vitolas they will roll out. Keep it on your radar and see what you think if/when they pop up at your local retail shop! Cheers!

Source: It’s a secret.
Brand Information: CAO Cigars 

IMG_2732.JPG

IMG_2733